 ReStore Staff
Furniture Facelift: 4 Ways to Restore Old Wood Furniture
Think back to the last time you saw a piece of wood furniture at a resale store or garage sale. The height and width were perfect, the shape was...
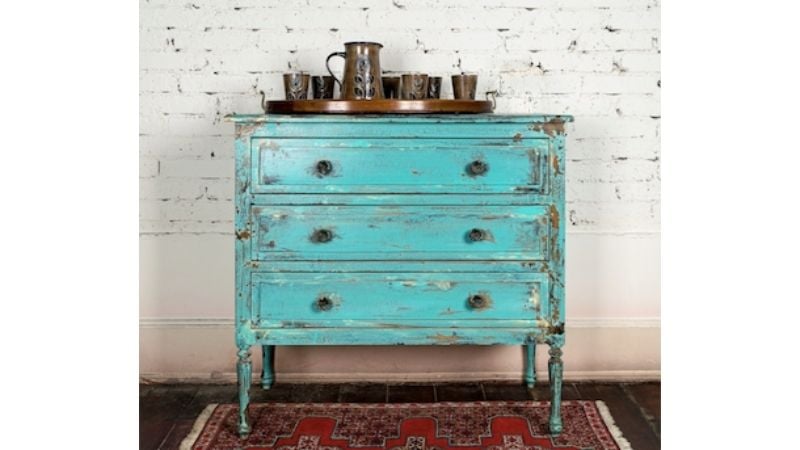
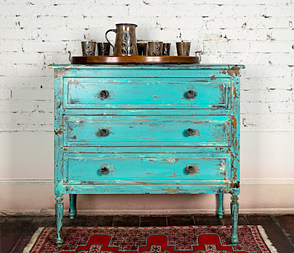 You don’t have to be a home décor expert to know that the rustic scheme rarely goes out of style, nor does the look of distressed antique furniture. Although, sometimes, it can be difficult to find a rustic one-of-a-kind piece that's still in good condition. This is where we challenge you to think outside of the box, because achieving that antique look for your wood furniture is possible if you're up for a fun project.
The next time you find a used table that’s in excellent condition, but lacks the character you love about antique finishes, don't swear it off. Here are seven ways to distress furniture to get the look you love.
How it distresses: Antiquing glaze is available in liquid form and glides on easily with a brush. You'll probably want to remove much (if not most) of the glaze with a lint-free cloth so that only a hint of the dark, moody color remains behind.
Where it works best: On handles, knobs, and pulls, on cool colors that can benefit from some warmth, and on wood grains that are worth calling attention to.
How it distresses: Chalky paint results in a matte and (you guessed it) chalk-like appearance, which can be further enhanced with other hands-on distressing techniques, such as sanding or removing paint with steel wool.
Where it works best: On large or imperfect pieces. Chalky paint is a novice's dream: it requires no prep work (besides cleaning the surface) and the paint can be applied heavily and still turn out great.
Twin Cities Habitat ReStore's Jan Hagerman shows you how to transform cheap furniture with chalk paint in this video:
How it distresses: A little planning can produce a stunning, two-tone effect. Apply jelly to areas where you want the base coat to show through. Wait for the jelly to set before painting or staining the furniture (or parts of it) a contrasting color. Then lightly sand the jellied areas. The top coat won't stick to these areas, revealing the two-tone effect.
Where it works best: Large, ordinary pieces of furniture that cry for an infusion of character.
How it distresses: Dry brushing requires the smallest amount of paint applied lightly over a previous coat. This two-step process – removing as much paint from the brush as possible and then using a light touch to apply what's left – requires restraint. But it's one of the surest ways to distress furniture like a pro.
Where it works best: Anywhere you wish to add visual interest, but especially on tall, vertical sections or long, horizontal sections of furniture.
How it distresses: It's fair to say that nothing can distress furniture more convincingly than a hammer, a key, a nail, or the bristles of a sharp wire brush. The trick is not to get carried away so that you damage the furniture to the point that it needs repair.
Where it works best: Any place where a random dent, scrape, or gouge will not look contrived, but especially around edges and bottoms.
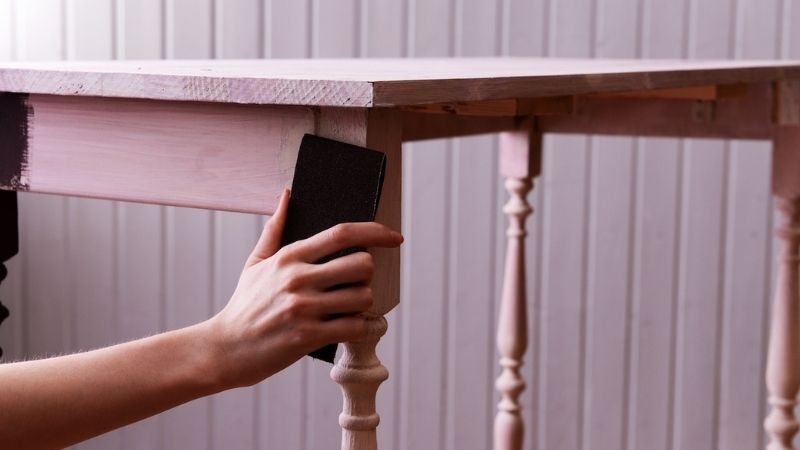
How it distresses: Removing paint with a sanding block or hand sander gives you great control over where you want the wear to be visible on a piece of furniture. But once the paint is gone, it's gone, so it's best to use a light touch and begin on a somewhat hidden area to distress furniture.
Where it works best: Around edges and handles, where many antique pieces show the most wear, too.
How it distresses: Removing paint with paint stripper isn't the ordeal it used to be — plenty of natural, chemical-free products are available that make removing paint with a scraper simple and straightforward. The trick with stripping is not going down to the bare wood.
Where it works best: On pieces with either many layers of paint or a heavily lacquered finish.
Distressing furniture is both fun and rewarding, especially if you practice first to ensure that you're exerting the right amount of force or emphasis. To keep your losses to a minimum, practice on a scrap piece of wood. In no time, you’ll have the skills to create the look you’ve always wanted.
Not sure if the rustic, antique look is what you're going for? Here are some additional ways to restore wood furniture: Furniture Facelift: 4 Ways to Restore Old Wood Furniture.
If reading this blog inspires you to go on a furniture treasure hunt, come check out the ReStore. We get furniture donations every day that may be perfect for this type of project, and there are always pieces you won’t find anywhere else. Visit either of our locations and see for yourself!

Your gift unlocks bright futures! Donate now to create, preserve, and promote affordable homeownership in the Twin Cities.

Think back to the last time you saw a piece of wood furniture at a resale store or garage sale. The height and width were perfect, the shape was...
![DIY Upcycling Ideas with ReStore [VIDEO]](https://restore.tchabitat.org/hubfs/blog/2018%20Blog%20Images/January/DIY%20Decor%20-%20Feature%20Image.jpg)
Looking for a creative outlet that doesn’t break the bank? Maybe during lockdown you busied yourself with remodeling a room (or many) in your home....

Backyard barbecues are a classic way to visit with family and friends. With COVID-19 still hanging around they are a great way to get together safely...