 ReStore Staff
Easily Transform Cheap Furniture with Chalk Paint [VIDEO]
Chalk painting is a really popular and easy technique to give your furniture a velvety, vintage look, or more of a distressed look. Twin Cities...

Think back to the last time you saw a piece of wood furniture at a resale store or garage sale. The height and width were perfect, the shape was perfect, but the finish was not. Did you walk away from it? If you did, you might have missed out on a great find.
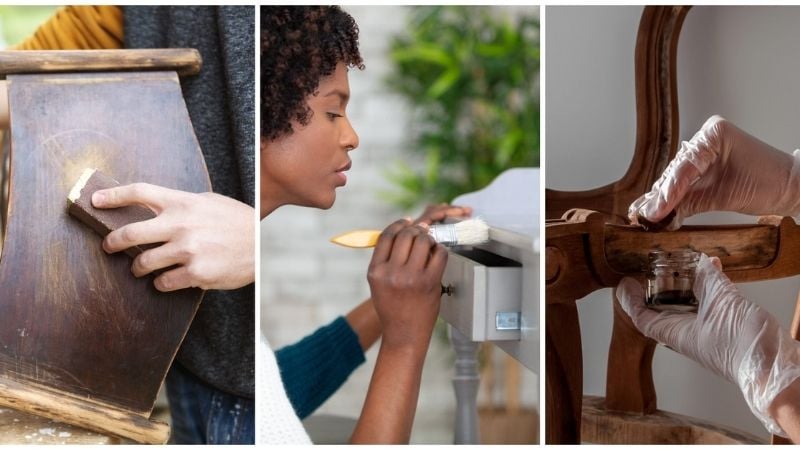
Wood furniture is surprisingly simple to transform, and it’s less expensive to refurbish than to go out and buy something brand new. Here are four powerful restoration techniques that will have that used item looking like new.
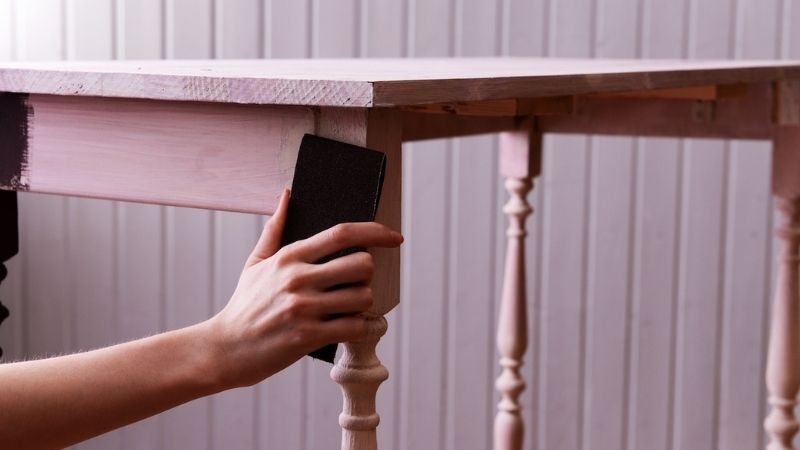
Start by removing the existing finish, and then clean the furniture with soap. Sand the furniture, wipe it down with a tack cloth, repair nicks or gouges, and apply one or more coats of stain. Sand and wipe it down again, and, if you wish, seal the furniture. Prep work is vital to the success of any wood restoration project, but stain is especially unforgiving once it dries. Removing all of it is vital and it’s a job made easier with today's chemical-free strippers. Also, some stains combine the rich color of a stain with polyurethane, thereby saving you a step at the end.
“To strip and restain is really a labor of love,” says Jan Hagerman, of Twin Cities Habitat for Humanity ReStore. “Stripping existing finish is a lot of work and staining with an even hand in order to prevent blotches is tough for a first time project.”
Since the first time staining a piece can be a challenge, Jan recommends practicing on a different piece of furniture if you’ve never tried this before.
Why you'll love it: If you gravitate to the look of wood grains and are up for this challenge, then staining could be the right choice because it will accentuate the grain in the wood. Many of today's wood stains are tinted, too, so if you like the idea of earth colors – coral, emerald, and even indigo blue – it could be worthwhile to expand your search beyond the typical wood-grain choices.
Download our Donation Value Guide as a PDF here.
To paint furniture, begin by removing the finish and cleaning the furniture with trisodium phosphate, sand the piece, wipe it down with a tack cloth, and repair any nicks or gouges. After your furniture is dry and free of dust, you may apply paint primer (though primer is optional, it can help paint better adhere to the wood). Then, sand and wipe down, again.
You then can begin applying paint with a brush. There are many types of paints to choose from, but one with a semi-gloss finish is always a nice go-to for furniture. After applying the first coat, allow it to dry fully, sand it, and wipe it down with trisodium phosphate, again. You’ll need to apply a second coat of paint, and possibly a third coat, as well. You may also use a paint sprayer, in lieu of a brush. These work well with larger items and can save time, as long as you're applying several thin coats. One heavy coat will lead to drips.
Why you'll love it: Paint affords solid coverage of the wood grain and opens your palette to literally hundreds of colors. Paint can infuse antique pieces with a fresh, updated look, especially if you replace the hardware with contemporary pieces. And if you want to match a piece of wood furniture to a rug, picture, or another accessory in a room, you can special-order a color.
“Repainting is much easier than restaining, especially if you try the chalk paint technique,” Jan says. “Painting is far more forgiving, chalk paint even more so.”
To give your furniture a distressed look, start by sanding it to retain the current finish. Remember to wipe the piece down with a tack cloth. If you do not wish to retain the current finish, go ahead and remove the finish, clean the furniture with trisodium phosphate, and paint or stain it. Once the paint or stain is completely dry, you will then sand the piece to show some distress (or aging) and wipe it down. Be sure to rub wax on areas you'd like the base coat to show through, and apply the top coat (which won't stick to the waxed areas). Rub steel wool over the waxed parts before applying a protective finish. This is a methodical approach, but you can always resort to a quicker, old-fashioned method such as pounding the furniture with a hammer or chain or sanding away the top coat.
Why you'll love it: Distressing can give you the look of vintage, antique furniture for only a fraction of the cost. “Distressing is the easiest from this list because you can cover the accidents,” Jan says.
Check Out Some Great ReStore DIYs Here
If you’re restoring something that has both wood and fabric elements, you can treat the wood portion using the techniques we shared above. Reupholstering (replacing the fabric part of the furniture) can be a fairly simple process. Find and measure out fabric of your choice, and wrap the new fabric around the cushioned area you’re upholstering. Fold the edges as you would when wrapping a gift, then pull the fabric tightly to smooth out any puckering. Staple the fabric into place on the underneath side of the furniture piece.
Why you'll love it: Maybe it's the duality of this project, the new finish and the new fabric, but you may feel like a furniture conqueror after completing this project. And after such a heady feeling of accomplishment, you're unlikely to ever walk away from a piece of wood furniture again.
So, the next time you're at a thrift store, used furniture store, or either of Twin Cities Habitat for Humanity's ReStore locations, we hope you will see used wood furniture in a whole new light. If you have any questions while shopping at either of our locations, feel free to ask. We love helping our customers find new ways to repurpose items

Your gift unlocks bright futures! Donate now to create, preserve, and promote affordable homeownership in the Twin Cities.

![Easily Transform Cheap Furniture with Chalk Paint [VIDEO]](https://restore.tchabitat.org/hubfs/blog/2016/October/DIY%20Transform%20Furniture%20-%20Featured%20Photo.jpg)
Chalk painting is a really popular and easy technique to give your furniture a velvety, vintage look, or more of a distressed look. Twin Cities...
![Learn from the Pros: How to Paint Furniture [VIDEO]](https://restore.tchabitat.org/hubfs/blog/2017/January/DIY%20Paint%20Furniture%20-%20Featured%20Photo%20v2.jpg)
If you've got some old pieces of furniture sitting around and want to give them a new life, or want to give your house some personality, painting the...
So you've decided to refurbish a piece of furniture – great! Refurbishing is a rewarding experience that lets you breathe new life into vintage and...