 Christy Ohlrogge
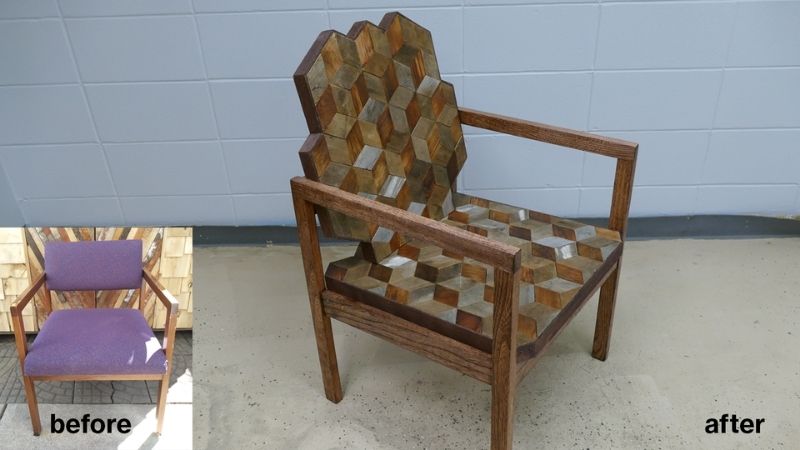
Check out the winners of the Freestyle Flip Upcycle Challenge
We had nine creative entries for the Freestyle Flip Upcycle Challenge. In contrast to the Earth Day Upcycle Challenge where people gave a chair some...

Hi everyone, I'm an AmeriCorps member serving in the Twin Cities Habitat for Humanity office. With this illustrious title comes everything you would expect: lack of construction skills.
I hit the ground running on my first upcycle - or more specifically upholstering a chair, so that you can have the tools you need to participate in the first round of our Upcycle Challenge. As you could guess, the first task is to work on a chair. So, just as anyone interested in the challenge - I traveled to one of our ReStores. Just ask a staff member and they can help you sign up and pick out a chair!
Now, I'll quickly step through the first three steps I did solely to bring out your inner DIYer - but, you can skip to upholstery if you aren't interested!
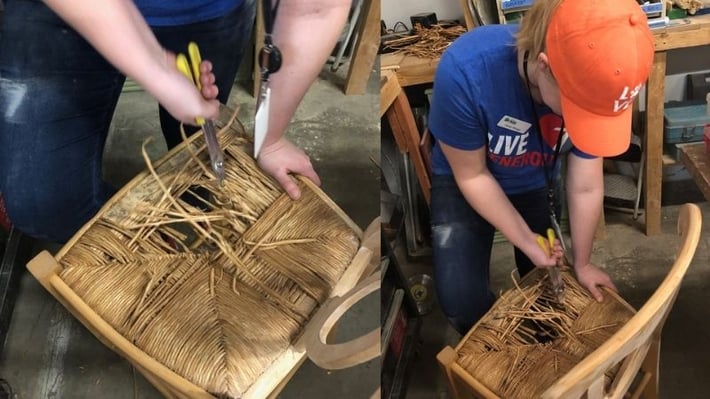
First thing I tackled was removing the current base. I simply used some pliers to break it apart and pull out the weaved material leaving just the frame of the chair. Our good friend, Jan, helped me with this tough task.
Once I had just the frame of the chair, the next thing to do was to create a new base that I would later upholster. Making the base was really easy!
The frame from the chair remained after I ripped out the material. I simply traced it onto a new board and cut that out. I also cut a few pieces of scrap wood and stapled them across the base to reinforce my chair.
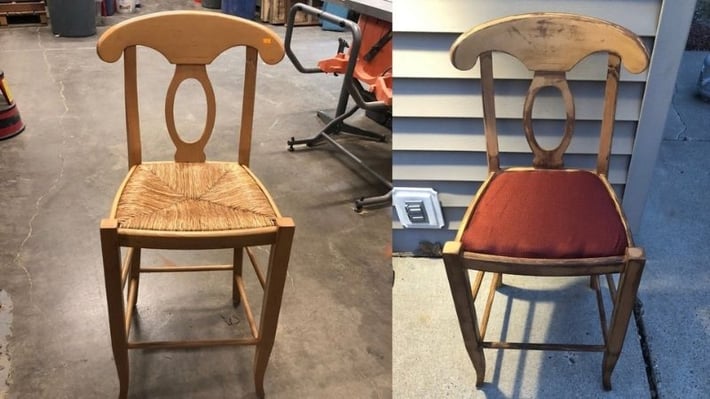
Once the basic pieces of the chair was ready to go - the next step was to sand and re-stain the chair for an easy facelift that brings out the grain of the wood.
Once I tackled the above steps, it was finally time to work on the upholstery. Here is what you will need:
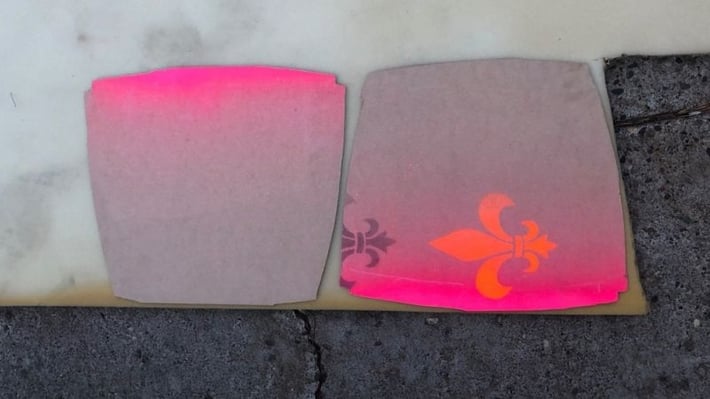
The first step of the upholstery was to cut pieces of foam for the cushion of the chairs. I simply set the boards on the foam and cut around them.
After that, I laid my fabric over both the cushion and base. Then I cut a piece that would cover both and wrap around with a couple of inches to spare for stapling to the base.
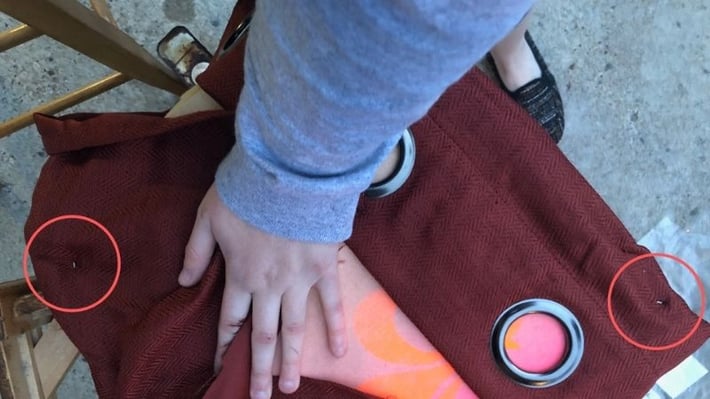
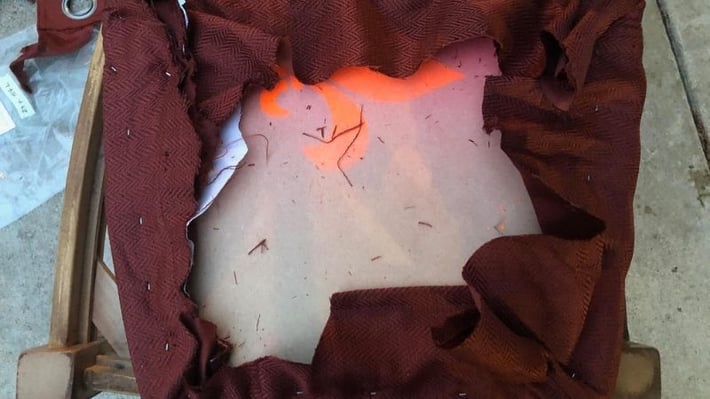
Once I wrapped the material around, I stapled one side of a corner to secure the fabric. I then pulled the opposite side's corner tight and stapled it as well so the fabric laid flat on the cushion side of the seat. I put circles on the image below to help.
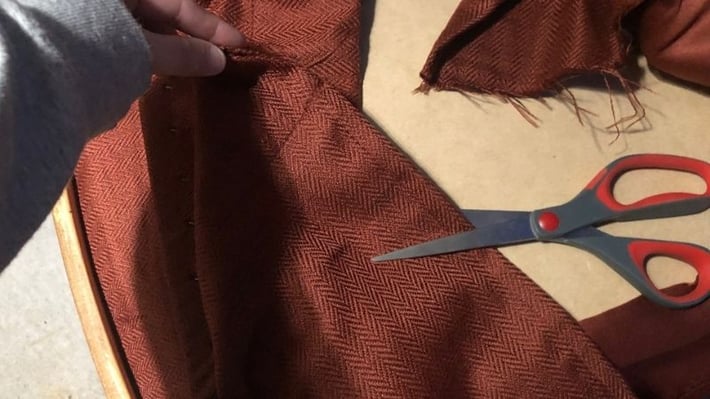
Slowly work your way around the base by doing the same thing - pick a corner and then follow with the opposite. Make sure to always pull your fabric tight so it stays flat on the reverse side (the top of your seat).
Once you have it secured all the way around, you can cut off excess fabric so it doesn't get in the way.
When you're done with that step, the under side of your seat cushion will look something like this:
That's it! You can flip it over and pop it into your chair, and see how wonderful your upcycle turned out. It's really that easy!
I had a lot of fun working on this project and trying out a new skill for the first time. Even if you don't think you'd be very good at it - I suggest dropping by and trying out the challenge!
It's a pretty cheap way to try a new project, and you could either keep your chair, or let someone else buy your masterpiece at the ReStore when it's finished (after the judging is over). Either way - you'll learn for the next chair you end up working on. Did I mention there's also some prizes involved?
Quick reminder: the last day to pick up a chair is today, March 29! Hurry on in and try it out for yourself.

Your gift unlocks bright futures! Donate now to create, preserve, and promote affordable homeownership in the Twin Cities.

We had nine creative entries for the Freestyle Flip Upcycle Challenge. In contrast to the Earth Day Upcycle Challenge where people gave a chair some...
In honor of Earth Day coming up next month, and ReStore outlets commitment to recycling and reusing items, we're hosting our first-ever Earth Day...
Amazing! We are blown away by all of the creativity and upcycling expertise in all of the entries for the Earth Day Upcycle Challenge! Many chairs...